
Did you know that the secret to a crackly brownie crust lies in dissolving sugar into warm eggs—rather than fat—so sugar crystals melt fully? That’s right! By swapping in high-quality melted chocolate and a trusty 1:1 gluten-free flour blend, you’ll get brownies so fudgy and rich, no one will guess they’re gluten-free. In this article, we’ll dive into pro techniques—from pan choice to resting time—to ensure every batch is a melt-in-your-mouth success!
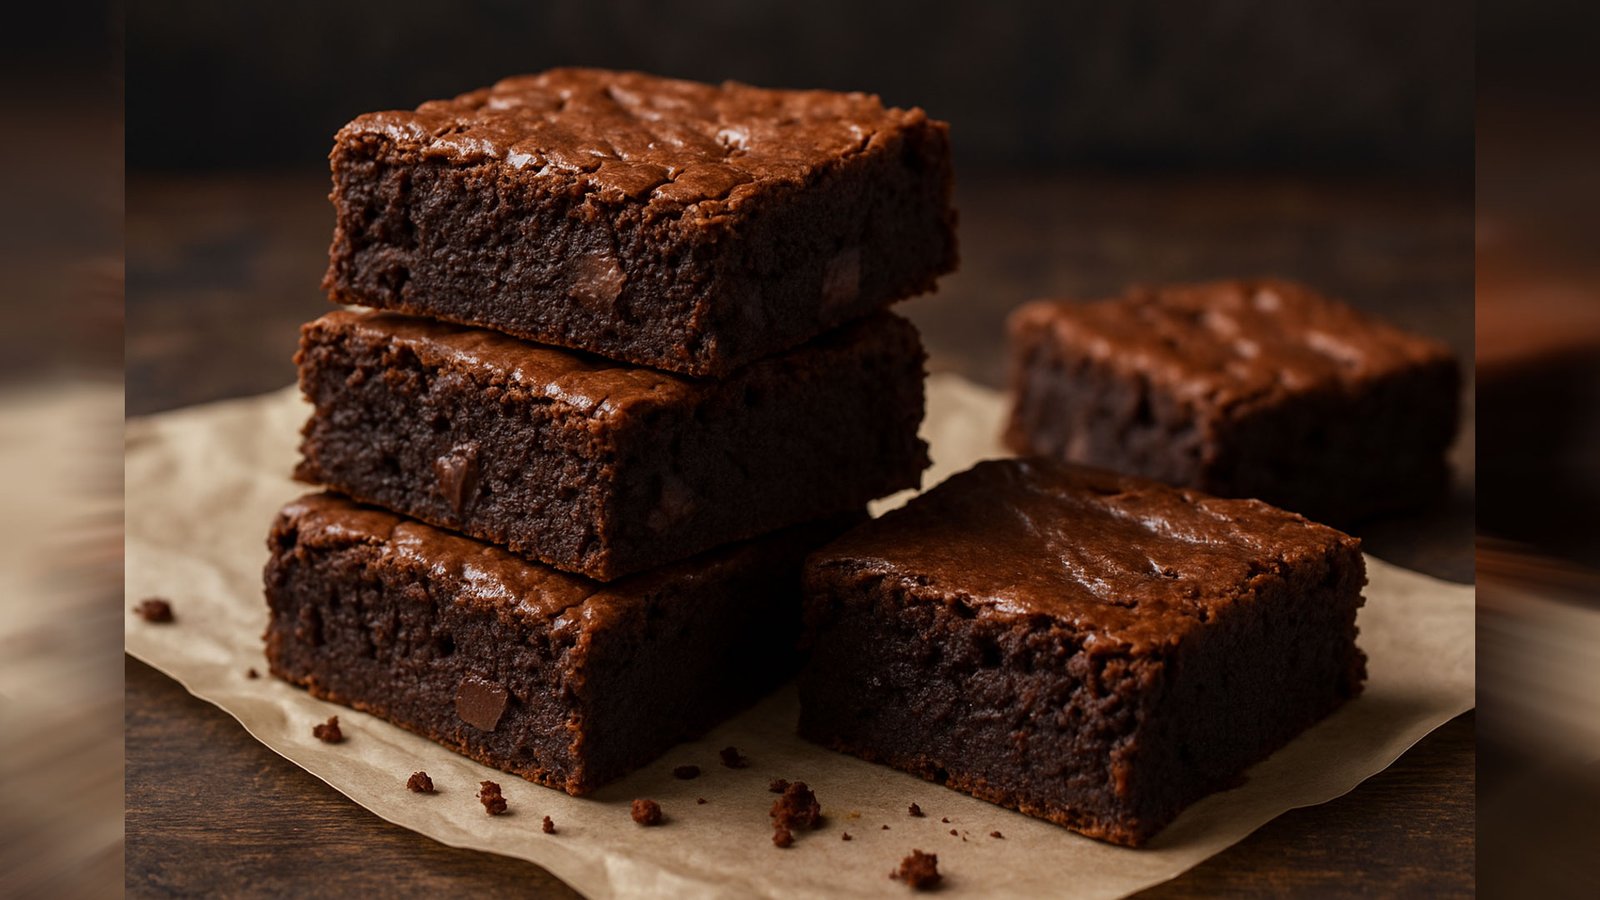
Welcome to Chocolate Bliss – If you’re anything like me, there’s just something about brownies (Gluten-Free Brownies) that instantly makes you smile. The smell of melted chocolate filling the kitchen, the flaky top that shatters slightly when you cut in, and that soft, chewy center—pure magic. These gluten-free brownies are everything I love in a brownie and more. Fudgy, chocolate-forward, and oh-so-easy to make, this recipe is about to become your new favorite.
Better Than the Box – I know how tempting it can be to grab a gluten-free brownie mix off the shelf. But once you see how simple (and delicious) it is to make them from scratch, you’ll never look back. Trust me—this recipe is just as easy, and the flavor? Way better. These are the kind of brownies that leave you sneaking a second piece before they even cool.
A One-Bowl Wonder – You don’t need any fancy equipment for this one—just a bowl, a whisk, and about 10 minutes of prep time. Whether you’re a seasoned baker or just starting out, this easy gluten-free brownie recipe is the kind of baking win you’ll come back to again and again. Plus, it’s naturally flourless with the right GF blend, and full of chocolatey goodness in every bite.
Instructions
Step 1: Preheat Your Oven
First things first—go ahead and preheat your oven to 350°F (175°C). A properly preheated oven is one of those little baking tricks that makes a big difference. While it heats, line an 8×8-inch baking pan with parchment paper or lightly grease it. I like to use a glass baking dish when I can because it helps the Gluten-Free Brownies bake evenly without over-drying the edges.
Step 2: Melt the Butter
In a large microwave-safe bowl, melt your butter. Let it cool for just a minute before moving on—you don’t want it piping hot when you mix in the sugar and eggs. I like to use real butter here because it gives these gluten-free brownies that rich, melt-in-your-mouth texture we all love. If you’re dairy-free, melted vegan butter works beautifully too.
Step 3: Whisk in the Sugars
Once your butter is melted and slightly cooled, whisk in the granulated sugar and brown sugar until smooth and glossy. That brown sugar is the secret to making Gluten-Free Brownies soft and chewy in the center while still giving you that classic flaky top. This step is also where you’re building the base of that shiny, crackly crust everyone goes crazy for in homemade Gluten-Free Brownies.
Step 4: Add Eggs and Vanilla
Now add in your eggs, one at a time, whisking well after each. This is when the batter really starts to come together. Stir in the vanilla extract too—it boosts that rich chocolate flavor and makes the Gluten-Free Brownies smell just heavenly while they bake. You’ll notice the mixture getting lighter and slightly thick—that’s exactly what you want.
Step 5: Mix the Dry Ingredients
In a separate bowl, whisk together your gluten-free flour blend, cocoa powder, salt, and baking powder. Make sure everything is well combined with no clumps. I like to use a high-quality 1-to-1 gluten-free flour blend with xanthan gum already in it. That way, you don’t have to fuss with extra binders, and your brownies come out with the perfect chewy bite every time.
Step 6: Combine Wet and Dry
Pour the dry ingredients into the wet mixture and stir until just combined. The batter will be thick and rich—don’t overmix it. This is the step where I like to fold in some chocolate chips or chopped nuts for a little extra texture and chocolatey goodness. You could even swirl in some nut butter or sprinkle the top with sea salt if you’re feeling fancy.
Step 7: Bake
Spread the brownie batter evenly into your prepared pan. Bake for about 25–30 minutes, depending on your oven. You’ll know they’re done when the edges look set and a toothpick inserted in the center comes out with just a few moist crumbs. Don’t wait for it to come out clean—that can lead to dry brownies, and nobody wants that.
Step 8: Cool and Slice
Let the Gluten-Free Brownies cool in the pan for at least 15–20 minutes before slicing. I know it’s hard to wait, but this step helps them firm up and makes cutting them so much easier. If you like your brownies super gooey, you can even enjoy one while they’re still warm (I always do).
Tips for Fudgy, Chewy Gluten-Free Brownies
Don’t Overbake
One of the biggest secrets to that perfect chewy center? Taking the Gluten-Free Brownies out at the right time. You want the edges to look set, but the center should still have a little jiggle. A toothpick inserted in the middle should come out with moist crumbs, not dry. If you wait for it to come out clean, you’ve probably overdone it. That’s the difference between a soft, fudgy brownie and one that’s dry and crumbly.
Use the Right Cocoa Powder
Not all cocoa powders are created equal. I like to use unsweetened Dutch-processed cocoa for a deeper, richer chocolate flavor. Natural cocoa works too, but it’s a little more acidic and gives a sharper bite. Whichever you use, make sure it’s good quality—you can really taste the difference in homemade gluten-free brownies.
Add a Touch of Brown Sugar
Granulated sugar gives brownies their shiny top, but brown sugar brings the chew. Even just a quarter cup added to your sugar mix can take your brownies from basic to bakery-style. It adds a bit of moisture and gives you that rich, almost caramel-like chewiness we all love in a gluten-free dessert.
Whisk Your Eggs Well
It might seem like a small step, but whisking your eggs until slightly frothy helps incorporate air and gives your Gluten-Free Brownies that signature flaky top. You don’t need a mixer—just a hand whisk and a little elbow grease. I always make sure the eggs are at room temperature so they mix in easily with the butter and sugar mixture.
Don’t Overmix the Batter
Once you add the dry ingredients, mix just until everything is combined. Overmixing at this stage can make your brownies dense or cakey—not what we’re going for here. The batter should be thick and glossy, almost like chocolate frosting. That’s your sign it’s ready to bake.
Cool Before You Cut
I know, I know—it’s tempting to dive right in while they’re warm (and I definitely sneak a corner sometimes). But if you want clean, picture-perfect squares with that dense, chewy texture, give them at least 15–20 minutes to set up in the pan. The center continues to firm up as it cools, giving you that ideal balance of gooey and structured.
Nutrition Info
Balanced Indulgence
While these gluten-free brownies are definitely a treat, they’re made with real, simple ingredients—so you can feel good about every bite. Whether you’re serving them after dinner, bringing them to a gathering, or sneaking one with your afternoon coffee (guilty), it helps to know what’s inside.
Nutrition per Serving (1 of 12 Gluten-Free Brownies)
Estimated values based on a standard recipe using a gluten-free flour blend, butter, and semi-sweet chocolate chips.
- Calories: 220
- Total Fat: 11g
- Saturated Fat: 6g
- Cholesterol: 35mg
- Sodium: 80mg
- Total Carbohydrates: 28g
- Dietary Fiber: 2g
- Sugars: 20g
- Protein: 3g
These numbers will vary slightly depending on the flour blend and chocolate you use, but overall, it’s a sweet spot between indulgent and balanced. And the best part? There are no strange additives or artificial fillers—just rich cocoa, wholesome ingredients, and that classic chewy brownie texture.
Making Them a Little Healthier
If you’re looking to tweak the recipe, you absolutely can. Swap in coconut sugar for a lower-glycemic option, use avocado oil instead of butter, or try a dairy-free chocolate to make them fully allergy-friendly. These Gluten-Free Brownies are flexible, which makes them perfect for all kinds of gluten-free diets and preferences.
🍫 Choosing the Right Chocolate and Cocoa for Gluten-Free Brownies
When it comes to baking gluten-free brownies that are both fudgy and delicious, selecting the appropriate chocolate and cocoa powder is crucial. Let’s explore how to make the best choices for your brownies.
🍫 Melted Chocolate: The Secret to Fudgy Gluten-Free Brownies
Incorporating melted chocolate into your brownie batter adds richness and moisture, resulting in a dense and fudgy texture. The cocoa butter in chocolate contributes to this moistness, making each bite indulgent .
Tips:
- Use high-quality chocolate: Opt for chocolate with a cocoa content between 60% and 70% for a balanced flavor.
- Melt gently: Melt chocolate slowly over a double boiler or in short bursts in the microwave to prevent burning.
- Combine with butter: Mixing melted chocolate with butter ensures a smooth and glossy batter.
🌟 Achieving a Shiny, Crackly Top
A shiny, crackly top is a hallmark of perfect brownies. This effect is achieved by properly dissolving sugar into the batter and incorporating chocolate chips .
Tips:
- Beat sugar and eggs well: Whisking sugar with eggs until the mixture is light and fluffy helps dissolve the sugar, contributing to a glossy top.
- Add chocolate chips: Folding in chocolate chips before baking can enhance the crackly crust and add bursts of chocolate flavor .
🍫 Choosing Between Natural and Dutch-Processed Cocoa
Cocoa powder comes in two main types: natural and Dutch-processed. Understanding the difference is essential for achieving the desired flavor and texture in your brownies.
- Natural Cocoa Powder: This type is acidic and has a strong, bitter flavor. It’s often used in recipes that call for baking soda, as the acidity activates the leavening agent .
- Dutch-Processed Cocoa Powder: Treated with an alkaline solution to neutralize its acidity, this cocoa has a smoother, more mellow flavor and a darker color. It’s typically used in recipes that include baking powder .
Tips:
- Check your recipe: Use the type of cocoa powder specified in your recipe to ensure proper chemical reactions and flavor balance.
- Consider flavor preferences: If you prefer a milder chocolate flavor, Dutch-processed cocoa is the way to go. For a more intense chocolate taste, opt for natural cocoa powder.
Selecting the right chocolate and cocoa powder is key to baking gluten-free brownies that are both fudgy and delicious. By using melted chocolate, achieving a shiny top through proper sugar incorporation, and choosing the appropriate type of cocoa powder, you’ll create brownies that are sure to impress.
🌾 Picking Your Gluten-Free Flour Blend
When baking gluten-free brownies, the choice of flour blend is crucial. The right blend ensures your brownies are moist, fudgy, and delicious. Let’s explore how to select the best gluten-free flour blend for your brownies.
🧁 Understanding Gluten-Free Flour Blends for Gluten-Free Brownies
Gluten-free flour blends are combinations of various gluten-free flours designed to mimic the properties of wheat flour. These blends often include a mix of rice flour, potato starch, and tapioca flour, among others. Some blends also contain xanthan gum, which helps provide structure to baked goods.
🥄 The Role of Xanthan Gum
Xanthan gum is a common additive in gluten-free baking. It acts as a binding agent, providing elasticity and structure to baked goods. Using a flour blend that includes xanthan gum can help your brownies hold together and achieve a desirable texture.
🏆 Recommended Gluten-Free Flour Blends
Several Gluten-Free Brownies flour blends are well-suited for brownie recipes:
- Bob’s Red Mill Gluten-Free 1-to-1 Baking Flour: This blend includes xanthan gum and is designed to replace wheat flour in recipes without additional adjustments.
- King Arthur Gluten-Free Measure for Measure Flour: Another reliable option that contains xanthan gum, making it suitable for brownies and other baked goods.
- Pillsbury Gluten-Free All-Purpose Flour: This blend also includes xanthan gum and has been used successfully in various gluten-free baking recipes.
These blends are widely available and have been tested in numerous recipes, making them dependable choices for gluten-free brownies.
⚖️ Measuring Flour Accurately
Accurate measurement of flour is essential in baking. For gluten-free flours, it’s recommended to use the “spoon and level” method:
- Spoon the flour into your measuring cup.
- Level it off with the back of a knife.
This method helps prevent using too much flour, which can lead to dense or dry brownies.
🧪 Experimenting with Homemade Blends
If you’re interested in creating your own gluten-free flour blend, you can combine different gluten-free flours to suit your taste:
- Almond flour: Adds moisture and a slightly nutty flavor.
- Tapioca starch: Provides chewiness and helps with browning.
- Sorghum flour: Offers a mild flavor and good nutritional profile.
When making your own blend, consider adding xanthan gum to help with structure.
Choosing the right gluten-free flour blend is key to baking brownies that are fudgy and delicious. Whether you opt for a commercial blend with xanthan gum or create your own mix, understanding the role of each component will help you achieve the best results.
🥄 Mastering the Batter
Creating the perfect gluten-free brownie batter is like crafting a masterpiece. Each step, from melting the chocolate to folding in the flour, plays a vital role in achieving that rich, fudgy texture we all crave. Let’s dive into the essential steps to master your brownie batter.
🍫 Melting Chocolate and Butter Together for Gluten-Free Brownies
Start by melting your chocolate and butter together. This combination forms the base of your brownie batter, providing richness and depth of flavor.
Tips:
- Use a double boiler or microwave: Melt the chocolate and butter slowly to prevent burning.
- Cool slightly: Allow the mixture to cool before adding eggs to avoid scrambling them.
This step ensures a smooth and glossy base for your brownies.
🥄 Whisking Sugar and Eggs
Next, whisk together the sugar and eggs until the mixture becomes pale and fluffy. This process incorporates air, contributing to the brownies’ structure and creating that coveted crackly top.
Tips:
- Use room-temperature eggs: They mix more easily and help achieve a uniform batter.
- Whisk thoroughly: Aim for a light and airy mixture to enhance the brownies’ texture.
A well-whisked sugar and egg mixture is key to achieving the perfect brownie consistency.
🌾 Incorporating Dry Ingredients
Sift together your gluten-free flour blend and cocoa powder to ensure even distribution and prevent lumps. Gently fold the dry ingredients into the wet mixture until just combined.
Tips:
- Avoid overmixing: Overmixing can lead to dense brownies.
- Use a spatula: Gently fold the ingredients to maintain the batter’s airiness.
This step ensures a smooth batter and contributes to the brownies’ tender crumb.
🍫 Adding Mix-Ins
Enhance your brownies by folding in mix-ins like chocolate chips, nuts, or dried fruit. These additions provide extra texture and flavor.
Tips:
- Coat mix-ins with flour: Lightly dusting them with gluten-free flour prevents sinking during baking.
- Limit quantity: Stick to about ½ to ¾ cup of mix-ins to maintain the brownies’ structure .
Thoughtful additions can elevate your brownies from good to exceptional.
🧪 Final Touches Before Baking
Pour the batter into a prepared baking pan, smoothing the top with a spatula. For an extra fudgy texture, consider chilling the batter in the refrigerator for 15-30 minutes before baking .
Tips:
- Line the pan: Use parchment paper for easy removal and clean edges.
- Preheat the oven: Ensure your oven is at the correct temperature before baking.
These final steps set the stage for perfectly baked brownies.
Mastering the batter is the heart of baking delicious gluten-free brownies. By carefully melting your chocolate and butter, whisking your sugar and eggs, gently folding in your dry ingredients, and thoughtfully adding mix-ins, you set yourself up for success. Remember, patience and attention to detail make all the difference.
🔥 Baking Techniques for Ultimate Fudginess
Achieving that rich, gooey center in gluten-free brownies isn’t just about the ingredients—it’s also about mastering the baking process. Let’s explore the techniques that ensure your brownies turn out perfectly fudgy every time.
🌡️ Bake at a Lower Temperature
Baking your brownies at a slightly lower temperature, around 325°F (163°C), allows for even cooking. This gentle heat ensures the edges set without overbaking the center, maintaining that desired fudgy texture .
⏱️ Don’t Overbake the Gluten-Free Brownies
For fudgy brownies, it’s better to underbake slightly. Remove them from the oven when the edges are set, but the center still appears soft. They will continue to cook as they cool, resulting in a moist and gooey interior .
🧪 Use the Toothpick Test Wisely
To check for doneness, insert a toothpick about 2 inches from the edge of the pan. If it comes out with a few moist crumbs, your brownies are ready. A clean toothpick indicates overbaking, while wet batter means they need more time .
❄️ Cool Completely Before Cutting
Allow your brownies to cool in the pan for at least 30 minutes before slicing. This resting period lets them set properly, making them easier to cut and enhancing their fudgy texture .
🧈 Maintain a High Fat-to-Flour Ratio
A higher proportion of fat (from butter or oil) to flour contributes to a denser, fudgier brownie. Reducing the amount of flour slightly can also help achieve this texture .
🥄 Mix Gently
Overmixing your batter can incorporate too much air, leading to a cakier texture. Stir until the ingredients are just combined to keep your brownies dense and fudgy .
🧂 Add a Touch of Cornstarch
Incorporating a small amount of cornstarch into your dry ingredients can enhance the chewiness of your brownies, contributing to that perfect fudgy consistency .
Mastering these baking techniques will elevate your gluten-free brownies to a new level of fudgy perfection. Remember, careful attention to temperature, mixing, and baking time makes all the difference.
❄️ Cooling and Storage Tips for Fudgy Gluten-Free Brownies
After baking a batch of delicious gluten-free brownies, proper cooling and storage are essential to maintain their fudgy texture and rich flavor. Let’s explore the best practices to keep your brownies fresh and delightful.
🧊 Let Them Cool Completely
Once your brownies are out of the oven, allow them to cool in the pan for about 30 minutes. This helps them set properly and makes slicing easier. Transferring them to a wire rack afterward can speed up the cooling process and prevent overbaking from residual heat.
🧼 Use an Airtight Container
Air exposure can dry out brownies quickly. To keep them moist, store your brownies in an airtight container. If you’ve cut them into squares, consider wrapping each piece individually in plastic wrap before placing them in the container. This method helps maintain their texture and prevents them from sticking together.
🌡️ Room Temperature Storage
If you plan to consume your brownies within 3 to 4 days, storing them at room temperature is ideal. Keep them in a cool, dry place away from direct sunlight. Ensure they’re in an airtight container to preserve their freshness.
🧊 Refrigeration for Extended Freshness
To extend the shelf life of your brownies up to a week, refrigeration is a good option. Place them in an airtight container, and if you’ve cut them, separate layers with parchment paper to prevent sticking. Before serving, let them come to room temperature or warm them slightly to restore their soft texture.
❄️ Freezing for Long-Term Storage
For longer storage, freezing brownies is effective. Wrap each brownie tightly in plastic wrap, then place them in a freezer-safe bag or container. They can be frozen for up to 3 months. When ready to eat, thaw them at room temperature or warm them gently in the microwave.
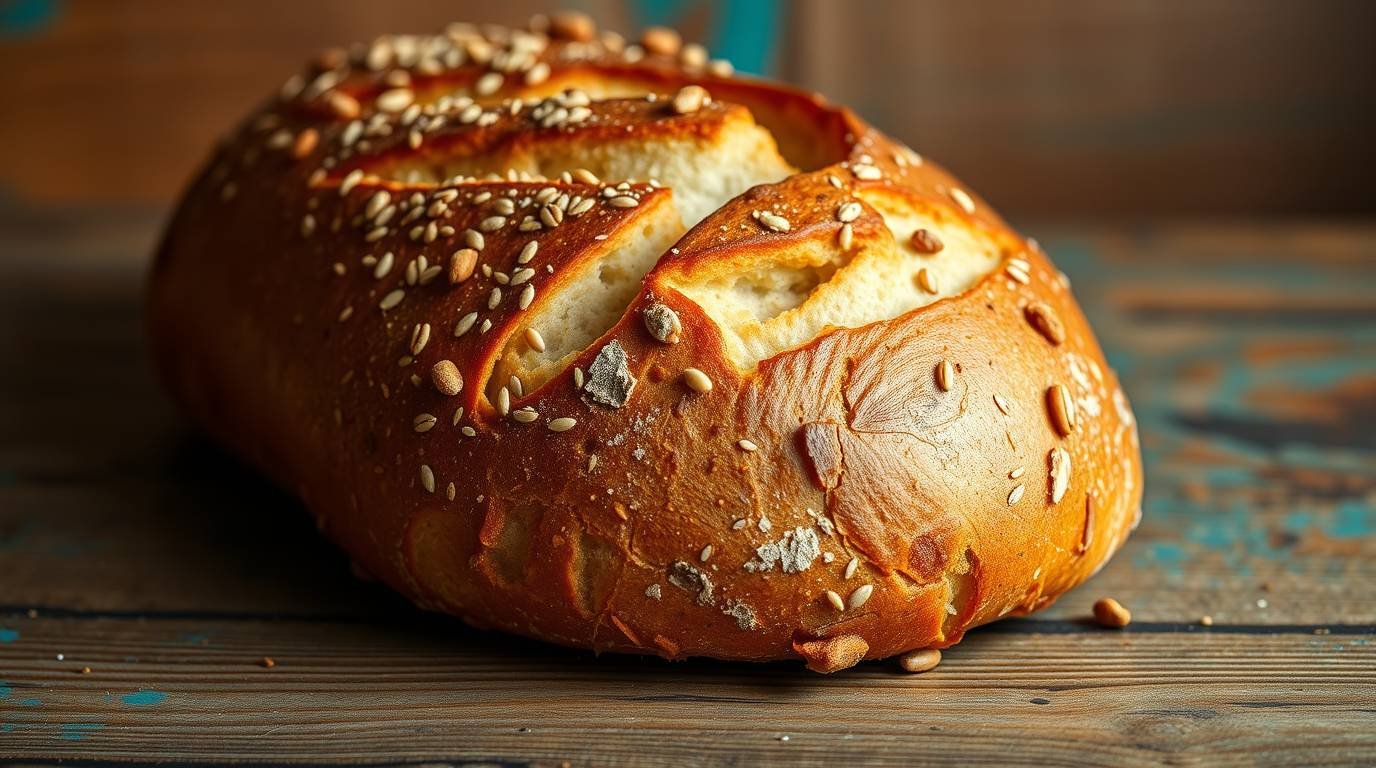
🍞 Keep Them Moist with Bread
A handy trick to maintain moisture is placing a slice of bread in the container with your brownies. The bread helps absorb excess air, keeping the brownies soft and chewy for a longer period.
Proper cooling and storage are key to enjoying your gluten-free brownies at their best. By following these tips, you can savor their fudgy goodness for days to come.
Baking gluten-free brownies can be a delightful adventure, but sometimes, things don’t go as planned. Let’s explore some common issues and how to fix them, ensuring your brownies turn out fudgy and delicious every time.
🧁 Problem: Brownies Are Too Dry
Dry brownies can result from overbaking or using too much flour.
Fixes:
- Check Baking Time: Bake until a toothpick inserted 2 inches from the edge comes out with a few moist crumbs. Overbaking can lead to dryness.
- Adjust Flour Blend: Ensure you’re using a balanced Gluten-Free Brownies flour blend. Some flours absorb more moisture than others.
- Add Moisture: Incorporate ingredients like applesauce or yogurt to add moisture to the batter.
🍫 Problem: Brownies Are Gummy or Dense
A gummy texture often indicates too much moisture or insufficient leavening.
Fixes:
- Measure Accurately: Use precise measurements for wet ingredients to avoid excess moisture.
- Check Leavening Agents: Ensure your baking powder or baking soda is fresh and active.
- Incorporate Binders: Add binders like xanthan gum or eggs to provide structure.
🍰 Problem: Brownies Crumble Easily
Crumbly brownies can result from a lack of binding agents or overmixing.
Fixes:
- Use Binders: Incorporate eggs or flaxseed meal to help hold the brownies together.
- Avoid Overmixing: Mix the batter just until combined to prevent incorporating too much air.
- Let Them Cool: Allow brownies to cool completely before cutting to help them set properly.
🔥 Problem: Brownies Have Hard Edges
Hard edges often occur when the brownies are overbaked or the pan is too hot.
Fixes:
- Monitor Baking Time: Check the brownies a few minutes before the recommended baking time ends.
- Use Proper Bakeware: Opt for light-colored metal pans, which distribute heat more evenly than dark pans.
- Trim Edges: If edges are too hard, trim them off and enjoy the soft center pieces.
Troubleshooting gluten-free brownies involves understanding how ingredients and techniques affect the final product. By paying attention to baking times, ingredient ratios, and mixing methods, you can overcome common issues and enjoy perfect, fudgy brownies every time.
Happy baking!
Gluten-Free Brownies
Summarize the key takeaways—melted chocolate, precise flour blends, gentle mixing, pan choice, and timing—then encourage readers to try the recipe and share their results on social media. Invite feedback: “Tag us @YourBakeBlog when you bite into your fudgy masterpiece!”
Frequently Asked Questions
Can I make these brownies dairy-free?
Yes, absolutely! This gluten-free brownie recipe works really well with dairy-free swaps. You can use vegan butter or even melted coconut oil in place of regular butter. Just keep in mind that coconut oil may give the brownies a slightly different flavor. For the chocolate chips, go with a dairy-free brand like Enjoy Life. You’ll still get all the chewy, chocolatey goodness—no dairy required.
What gluten-free flour works best?
I recommend using a high-quality 1:1 gluten-free baking flour blend. Look for one that includes xanthan gum or guar gum for structure. These help mimic the texture you’d get from all-purpose flour and give your brownies that soft, chewy bite. I’ve had the best luck with King Arthur and Bob’s Red Mill blends. Almond flour or coconut flour won’t work as a straight swap in this recipe—they absorb liquid differently and will throw off the balance.
Can I freeze gluten-free brownies?
Definitely! These brownies freeze beautifully. Let them cool completely, then cut into squares and wrap them individually in plastic wrap or foil. Place them in an airtight container or freezer bag, and they’ll keep for up to 2 months. When you’re ready to enjoy one, just let it thaw at room temperature—or warm it up in the microwave for 15 seconds for that gooey center.
Why are my brownies dry or crumbly?
It usually comes down to overbaking or using the wrong type of flour. These brownies are meant to be fudgy and soft, so make sure to pull them from the oven when the center still looks just a little underdone. A toothpick should come out with a few moist crumbs—not clean. Also, stick with a gluten-free flour mix made for baking. Some blends are better suited for cookies or cakes, and they can result in a dry or grainy texture in brownies.
How do I get that shiny, crackly top?
It’s all about the sugar and eggs! Whisking the sugar into warm butter helps dissolve it just enough to create that shiny crust as the brownies bake. And make sure to beat the eggs in well—it adds structure and encourages that perfect top layer to form. This is the step that really sets homemade gluten-free brownies apart from boxed mixes.

0 Comments